2 -
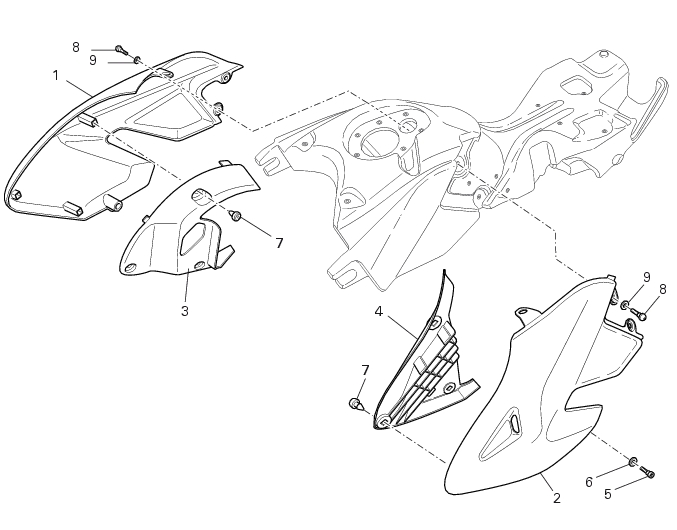
Fairing
1
Right fairing
2
Left fairing
3
Rh panel
4
Lh panel
5
Screw
6
Washer
7
Quick fastener
8
Screw
9
Washer
Parts catalogue
1100
FAIRING
1100S
FAIRING
Caution
Bold reference numbers in this section identify parts shown in this exploded view diagram. These parts do not appear in the
figures near the text.
Removing the side fairings
Operations
Reference - See Section
Remove the seat
E 3,
Removing the seat
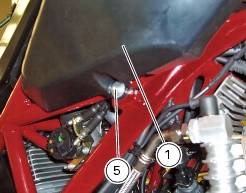
Unscrew the retaining screw (5) of the right fairing (1) and collect the washer (
6
).
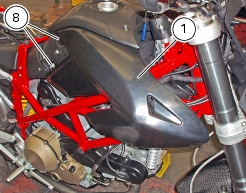
Unscrew the screws (8) securing the right fairing (1) to tank and collect the washers (
9
).
Remove the complete right-hand fairing (1) from the vehicle.
Proceed in the same way for the left-hand fairing (
2
).
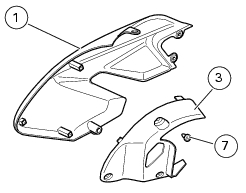
Disassembling the fairing
Loosen the quick-fasteners (7) and remove the right-hand panel (3).
Proceed in the same way for the left-hand fairing (
2
).
Note
Remove the left-hand panel (
4
) to gain access to the glove compartment.
To reassemble the fairing, follow the disassembly procedure in the reverse order.
Refitting the side fairings
Note
Failure to refit or correctly install any one of the parts you have removed may result in one or more components coming off
unexpectedly while riding, leading to loss of control.
Tighten the screws (8) securing the right fairing (1) to tank and fit the washers (
9
).
Tighten the retaining screw (5) of the right fairing (1) and fit the washer (
5
).
Tighten all the fairing retaining screws to the specified torque (Sect. C 3,
Frame torque settings
).
Proceed in the same way for the left-hand fairing (
2
).
Operations
Reference - See Section
Refit the seat
E 3,
Refitting the seat
1